
Different Types of Home Recording Studio Equipment
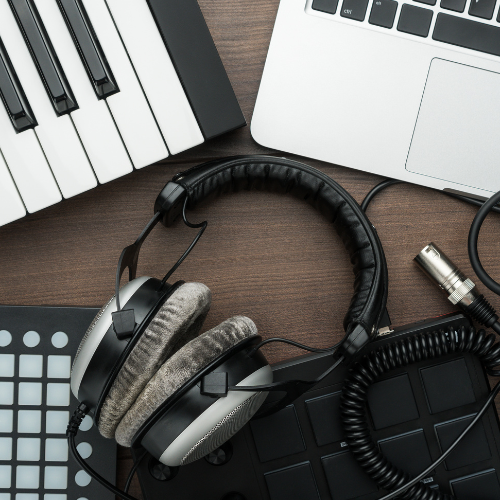
In building a studio, an array of home recording studio equipment harmoniously works together to produce the desired sound quality. The setup typically includes monitor speakers, headphones, microphones, mixers, audio interfaces, and essential accessories like stands and acoustic treatments, each contributing its unique function.
Monitor speakers and studio headphones form the core of audio playback and monitoring. While monitor speakers offer a flat frequency response crucial for accurate mixing, headphones provide detailed sound for critical listening. Meanwhile, microphones, the heart of the studio, range from sensitive condenser types, ideal for vocals and acoustic instruments, to robust dynamic models, perfect for louder sources like drums.
Alongside these, mixers and audio interfaces are key in shaping and capturing sound. Mixers allow for the blending and manipulation of multiple audio sources, whereas audio interfaces are essential for converting analog signals into digital formats and vice versa, ensuring high-quality recording and playback.
Each recording setup for home studios will differ depending on the specific purpose of the studio. For example, if you are recording live instruments, you will most likely be using an audio interface with a DAW on your computer for mixing purposes. On the other hand, if you are recording a podcast or voice recording, you will more than likely want to use a mixer and condenser microphones.
The studio's functionality is enhanced by the inclusion of stands and acoustic treatment. Stands, including microphone stands and pop filters, aid in optimal positioning and sound capture, reducing unwanted noise. Acoustic treatments like foam panels are vital for improving acoustics, ensuring that recordings are clear and free from unwanted echoes or reverberations.

Choosing the Right Home Recording Equipment
In order to choose the right home recording equipment, begin by evaluating the type of recording you'll be doing. Are you focusing on music production, podcasting, or voice-over work? This will determine the kind of equipment you need. For instance, music production may require a variety of microphones to capture different instruments, whereas podcasting might need a setup that excels in vocal clarity.
Balance between quality and budget is crucial. While high-end equipment offers better sound quality and durability, it's important to consider what fits within your budget. Starting with a low or mid-range setup can be a wise choice, allowing you to upgrade individual components as your skills and needs evolve.
Consider the acoustics of your recording space. A smaller room might not need large, powerful monitor speakers, and certain microphones might perform better in your specific environment. Also, ensure that all your equipment is compatible with each other. For example, check that your audio interface has enough inputs and outputs for your microphones and instruments.
Look for equipment that offers the functionality you need. If you're a solo artist, a simple two-channel audio interface might suffice, but for recording a band, you may need more inputs. Additionally, consider the features of each piece of equipment, like the availability of built-in effects on mixers or the polar patterns of microphones.
Think about the longevity of your equipment. Investing in gear that can handle a variety of recording situations and is known for its durability can save you money in the long run.
Choosing the right home recording equipment involves a careful assessment of your specific needs, budget considerations, room acoustics, equipment compatibility, functionality, features, and future-proofing. By taking these factors into account, you can build a home studio that fully meets your requirements.
Recording Equipment for Music Production
Microphones are the frontline in capturing audio. Condenser microphones, known for their sensitivity, are ideal for vocals and delicate acoustic instruments. Dynamic mics, handling high sound pressure well, are suited for robust sources like drums and electric guitars.
Central to the digital recording process, audio interfaces convert analog signals into digital format. Quality preamps within these interfaces ensure the clarity and warmth of the recorded sound. The choice of an interface depends on the scale of production, with more inputs required for larger setups.
While traditional mixers adjust and blend audio tracks, much of this work in modern music production is done within Digital Audio Workstations. DAWs are pivotal, providing extensive editing, mixing, and mastering capabilities, essential for producing polished musical tracks.
Studio monitor speakers and headphones are crucial for accurate sound monitoring. Monitors provide a flat frequency response for true sound representation, essential in mixing, while headphones are vital for isolated listening during recording sessions, preventing microphone bleed.
For electronic music, MIDI controllers and synthesisers are key. Controllers facilitate musical input and manipulation within DAWs, while synthesisers allow the creation of a vast range of sounds, from emulating traditional instruments to crafting unique electronic textures.
In essence, recording equipment for music production involves a wide range of gear, each component serving a distinct purpose. From capturing the initial sound with microphones to the intricate editing and mixing in DAWs, and the creative flexibility provided by MIDI technology, the right equipment setup is foundational in transforming musical ideas into professional-grade recordings.
Recording Gear for Podcasting
In podcasting, the microphone is the most critical piece of equipment. Dynamic microphones are often used due to their durability and ability to reject background noise, making them ideal for capturing clear spoken words. Condenser microphones can also be used for their sensitivity and rich sound, but they require a more controlled environment to avoid picking up unwanted noise.
A reliable audio interface is essential for converting the analog signals from the microphone into a digital format for recording. For podcasters, an interface with one or two channels is usually sufficient. It's important to choose an interface with high-quality preamps to ensure the voice is recorded cleanly and clearly.
For podcasts involving multiple speakers, a mixer becomes a valuable tool. It allows for the control and blending of several audio inputs, providing flexibility in managing levels and inputs during recording. Some mixers also offer built-in effects that can enhance vocal quality.
Good quality headphones are crucial for monitoring audio while recording. Closed-back headphones are recommended for podcasting as they prevent sound leakage that could be picked up by the microphone.
For the simplest setup, USB condenser microphones are often used for podcasting. These microphones do not require an audio interface or mixer, as they connect directly to a PC or laptop using a built-in soundcard. This can massively reduce the amount of equipment needed to record a podcast, and is often the preferred choice for beginners or people who aren’t as tech-savvy.
Recording Gear for Podcasting encompasses a range of equipment, each serving a specific purpose to ensure the production of high-quality audio. From selecting the right type of microphone to using an appropriate audio interface, mixer, headphones, and recording software, each element plays a critical role.
Home Recording Techniques and Tips
The placement of your microphone can drastically affect the sound quality. For vocal recordings, position the microphone about 6-12 inches away from the mouth to capture a clear, detailed sound while minimising plosives (hard 'p' and 'b' sounds). When recording instruments, consider the unique characteristics of each. For example, placing a microphone close to the sound hole of an acoustic guitar captures more bass, while positioning it near the 12th fret offers a balanced sound. Experimenting with different angles and distances can help in finding the sweet spot that best represents the instrument’s natural tone.
Setting the right recording levels is vital to avoid distortion and ensure a clean signal. Aim to record at levels where the peaks reach about -6 dB on your digital audio workstation’s meter. This leaves enough headroom for mixing and mastering, preventing clipping (distortion caused by too high a signal) and preserving the dynamic range of the recording.
Minimising background noise is essential for a professional-sounding recording. Choose a quiet environment and turn off any unnecessary electronics that might cause interference. Using directional microphones, like cardioid or hypercardioid, helps isolate the sound source from unwanted ambient noise. Additionally, consider using pop filters for vocals to reduce plosives and breath sounds.
The acoustics of your recording space greatly influence the sound. Reflective surfaces can cause echoes and reverberations. Using acoustic treatment like foam panels or bass traps can help to control these reflections, resulting in a cleaner and more focused recording.

Signal Flow of a Home Recording Studio: Simplified
When starting a new studio at home, it is important to first understand the signal flow of your studio and how each piece of equipment interacts with each other. This example of a basic music recording setup will help you understand, in basic terms, how a recording is achieved:
The Sound Source and Microphone: Imagine a singer with an acoustic guitar as our sound source. The first step in the workflow involves capturing this sound. For the vocals, a condenser microphone is often used, capturing the nuances of the voice. For the guitar, a dynamic microphone might be positioned near the sound hole or the fretboard, depending on the desired sound.
Audio Interface: Once the sound is captured by the microphones, it travels through cables to an audio interface or mixer. The audio interface serves as a bridge between the microphones and the computer. It converts the analog sound signals into digital signals that a computer can understand. The audio interface also allows control over the volume levels of the microphones, ensuring the sound is neither too loud nor too quiet.
Computer and Digital Audio Workstation (DAW): The digital signals from the audio interface are then fed into a computer, where they are processed in a Digital Audio Workstation (DAW). A DAW is software that allows for recording, editing, and mixing of the sound. Here, the raw sound from the singer and guitar can be polished – adjusting the timing, tuning the vocals, balancing the levels between voice and guitar, and adding effects like reverb for a richer sound.
Monitoring: Throughout this process, monitoring is essential. Using studio monitor speakers or headphones, the producer listens to the sound as it’s being recorded and adjusted. This ensures that the final recording is clear, well-balanced, and free from unwanted noise or distortions.
Essential Equipment for Home Recording Studios
In every home recording studio, certain essential pieces of equipment are crucial, whether the focus is on music recording or podcasting. These foundational pieces of home recording studio equipment facilitate high-quality sound capture and production, forming the backbone of any effective home studio setup.
The microphone is the starting point of any recording. For music recording, a variety of microphones may be used depending on the instruments. Typically, a large-diaphragm condenser microphone is a versatile choice, ideal for capturing the nuanced details of vocals and a wide range of instruments.
An audio interface, as well as some mixers with a built-in audio interface, is essential in converting the analog signals from the microphone into a digital format that can be used by a computer. For both music production and podcasting, a good quality audio interface with clean preamps and sufficient inputs and outputs for your microphones and instruments is vital.
Headphones are crucial for monitoring while recording. They prevent sound from leaking into the microphone, which is especially important for podcasting and vocal recordings. Additionally, they offer an intimate listening experience, allowing for detailed monitoring of the recording.
A DAW is the software used for recording, editing, and mixing audio tracks. It's where the digital sound from the audio interface is shaped into a final product. For both music and podcasting, a user-friendly DAW that fits your specific workflow and production style is important.
For music production, studio monitor speakers are necessary for mixing and mastering tracks. Unlike regular speakers, studio monitors provide a flat frequency response for accurate sound reproduction, crucial for making precise adjustments to your mix.
Lastly, don’t overlook the basics like XLR cables for microphones and sturdy stands. Reliable cables ensure a clean signal flow, and stands position microphones correctly to capture the best sound.

Optional Accessories to Improve Your Home Studio
A pop filter or windscreen is a simple accessory that can make a big difference, especially in vocal recordings. They help to reduce plosives - the popping sounds caused by fast-moving air hitting the microphone when pronouncing certain consonants like 'p' and 'b'. This results in clearer and more professional-sounding recordings.
Good room acoustics play a vital role in achieving high-quality recordings. Acoustic foam panels, bass traps, and diffusers can be used to minimise unwanted echoes and reverberations in the studio. They help in creating a more controlled recording environment.
While many audio interfaces come with built-in preamps, investing in an external preamp can offer higher quality and more control over the sound. Additionally, external signal processors like compressors, equalizers, and effects units can provide more options for shaping and enhancing the sound during recording and mixing.
For those involved in electronic music production, a MIDI controller is a valuable addition. It allows for more intuitive and tactile control over virtual instruments and DAW functions, making the music creation process more hands-on and expressive.
Depending on the instruments you record, additional equipment like direct boxes for electric guitars or specialised microphones for specific instruments can enhance the recording quality.
While not essential, these optional accessories - pop filters, acoustic treatment, external preamps and processors, MIDI controllers, and instrument-specific gear - can significantly improve the quality and functionality of your home studio, making your recording experience more professional and efficient.
Conclusion
In conclusion, setting up a home recording studio involves selecting the right mix of essential and optional equipment to meet your audio production needs. Whether it’s for music recording or podcasting, understanding the role of each piece of gear, from microphones and audio interfaces to acoustic treatments and MIDI controllers, is crucial. A well-equipped studio not only enhances the quality of your recordings but also makes the process more efficient and enjoyable.
As you build and refine your studio, focus on balancing functionality with your personal preferences and requirements. The goal is to create a space where technical capability supports your creative endeavors, enabling you to produce clear, professional-quality audio. Keep in mind that your studio can evolve over time, adapting to new skills and projects. With the right setup, your home recording studio can become a powerful tool in your creative arsenal, helping you bring your audio visions to life.
